GDExtension的C++示例
GDExtension的C++示例
本文按照官方文档,进行c++的GDExtension插件开发,主要进行文档进行复刻,同时对文档中未涉及步骤进行补充
什么是GDExtension
除了GDScript和C#这两种脚本语言外,Godot引擎可以执行其他编程语言编写的代码。目前有两种方式实现:C++模块与GDExtension
简单的对这两种方式进行对比:
| 支持的语言 | 是否需要和引擎一起编译 | |
|---|---|---|
| C++模块 | C++ | 是 |
| GDExtension | C++,Go,D,Haxe,RustSwift | 否 |
GDExtension官方明确维护C++版本,同时目前没有别的语言的维护计划,上表所列出的其他语言均由社区维护,用于生产前请进行充分调研
由上表可以知道,GDExtension由于无需和引擎一起编译,使用更灵活,并且支持更多语言。
使用GDExtension的依赖
- Godot4可执行程序
- c++编译器
- SCons 作为构建工具
- godot-cpp 仓库的副本
安装godot-cpp
推荐将godot-cpp作为项目的git子模块
# 创建项目目录
mkdir gdextension_cpp_example

# 进入目录
cd gdextension_cpp_example
# 创建demo目录用于存放godot项目相关文件
mkdir demo
# 创建src目录用于存放GDExtension的c++代码
mkdir src

# 初始化git版本管理
git init
# 将godot-cpp作为git子模块加入项目,并切换至4.2分支(对应你的godot版本)
git submodule add -b 4.2 https://github.com/godotengine/godot-cpp
# 更新godot-cpp子模块
cd godot-cpp
git submodule update --init
项目结构
本次项目结构如下所示
gdextension_cpp_example/
|
+--demo/                  # game example/demo to test the extension
|
+--godot-cpp/             # C++ bindings
|
+--src/                   # source code of the extension we are building
SCons构建系统
使用Anaconda+Python虚拟环境+pip来搭建SCons构建系统环境
安装Anaconda
该步骤可参考官方文档
Conda安装Python虚拟环境
All SCons software (SCons itself, tests, supporting utilities) will be written to work with Python version 3.6+.
根据官网手册介绍,Scons的python依赖版本为3.6+,这里我搭建一个3.11的环境(版本介绍页面,python每个版本支持5年,3.11支持到2027-10)
# 查看当前环境(可选)
conda env list

# 查看当前环境的包(可选)
conda list
pip list

# 检查conda更新(可选)
conda update conda

# conda清理(可选)
conda clean -p      //删除没有用的包(推荐)

# 创建虚拟环境
conda create -n your_env_name python=3.11

# 激活虚拟环境
conda activate your_env_name
安装SCons
由于conda中SCons最新版为V3.12无法进行godot构建,要求V4.0+,因此需要使用pip方式安装
pip install scons

# 安装后使用查看版本
scons --version
构建C++绑定
项目中的godot-cpp/gdextension/extension_api.json
仓库中该文件已经存在,当你的版本与仓库配置文件中描述的版本不同时,你需要自己手动生成你使用版本对应的extension_api.json
extension_api.json解读
查看版本
查看header字段的版本与使用的版本是否相同,例子中我使用的godot版本为V4.2.2,与配置文件对应
	"header": {
		"version_major": 4,
		"version_minor": 2,
		"version_patch": 2,
		"version_status": "stable",
		"version_build": "official",
		"version_full_name": "Godot Engine v4.2.2.stable.official"
	},

生成当前版本的extension_api.json
当你的版本与仓库中的extension_api.json版本不匹配时,你可以手动生成当前版本的配置文件,详细信息查看官方手册,方法如下:
# 进入godot安装目录
cd godot_bin_path

# 生成extension_api.json
godot --dump-extension-api

# 执行结束会在可执行程序godot目录下生成配置文件godot_bin_path/extension_api.json

# 拷贝到项目目录中,放在哪里自己决定,后续需要根据该文件配置scons
cp extension_api.json path_to_your_project/
构建绑定
若要生成和编译绑定,请使用以下命令(替换 <platform> 为 windows 或 linux macos 取决于您的操作系统):
cd path_to_your_project/godot-cpp
scons platform=<platform> custom_api_file=<PATH_TO_FILE>
cd ..
这一步将需要一段时间. 完成后, 你应该有一个静态库, 可以编译到你的项目中, 存储在 godot-cpp / bin / 中.
你可能需要在 Windows 或 Linux 的命令行中添加
bits=64。
实现一个简单的插件
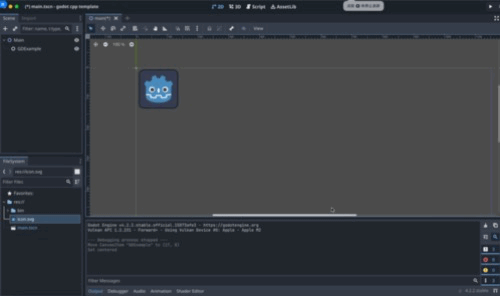
- 打开
Godot在demo中新建一个项目 - 在我们的演示项目中, 我们将创建一个包含名为 "Main" 的节点的场景, 我们将其保存为
main.tscn . 我们稍后再回过头来看看.
该例中创建一个名为GDExample的插件,该插件继承自Sprite2D
创建插件头文件
首先新建插件的头文件gdexample.h
#ifndef GDEXAMPLE_H
#define GDEXAMPLE_H

#include <godot_cpp/classes/sprite2d.hpp>

namespace godot {

class GDExample : public Sprite2D {
	GDCLASS(GDExample, Sprite2D)

private:
	double time_passed;

protected:
	static void _bind_methods();

public:
	GDExample();
	~GDExample();

	void _process(double delta) override;
};

}

#endif
我们解读上述的代码
- 命名空间
godot,因为GDExtension中所有内容都在这个命名空间内 - 继承
Sprite2D包含sprite2d.hpp - 宏
GDCLASS用于设置一些例行执行的操作 - 我们定义了一个
time_passed成员,用于保存运行时间 - 静态方法
_bind_methods,Godot 将调用它来找出可以调用哪些方法以及它公开了哪些属性。 -
_process方法,与GDScript中的_process工作方式相同,每帧会进行调用
创建源文件
新建gdexample.cpp,上述插件方法的具体实现在此处进行实现
#include "gdexample.h"
#include <godot_cpp/core/class_db.hpp>

using namespace godot;

void GDExample::_bind_methods() {
}

GDExample::GDExample() {
	// Initialize any variables here.
	time_passed = 0.0;
}

GDExample::~GDExample() {
	// Add your cleanup here.
}

void GDExample::_process(double delta) {
	time_passed += delta;

	Vector2 new_position = Vector2(10.0 + (10.0 * sin(time_passed * 2.0)), 10.0 + (10.0 * cos(time_passed * 1.5)));

	set_position(new_position);
}
-
_process中我们根据当前时间,使用正弦与余弦函数计算出精灵的新位置
除了以上插件类的c++代码,我们的GDExtension插件可以包含多个插件类,每个类都有自己的头文件与源文件,就像GDExample一样。
在插件类编码完毕后,我们还需要一个register_types.cpp文件,该文件负责告诉Godot我们插件中的所有类。
编写注册函数
创建register_types.cpp
#include "register_types.h"

#include "gdexample.h"

#include <gdextension_interface.h>
#include <godot_cpp/core/defs.hpp>
#include <godot_cpp/godot.hpp>

using namespace godot;

void initialize_example_module(ModuleInitializationLevel p_level) {
	if (p_level != MODULE_INITIALIZATION_LEVEL_SCENE) {
		return;
	}

	ClassDB::register_class<GDExample>();
    // ClassDB::register_class<YourOtherClass>();
}

void uninitialize_example_module(ModuleInitializationLevel p_level) {
	if (p_level != MODULE_INITIALIZATION_LEVEL_SCENE) {
		return;
	}
}

extern "C" {
// Initialization.
GDExtensionBool GDE_EXPORT example_library_init(GDExtensionInterfaceGetProcAddress p_get_proc_address, const GDExtensionClassLibraryPtr p_library, GDExtensionInitialization *r_initialization) {
	godot::GDExtensionBinding::InitObject init_obj(p_get_proc_address, p_library, r_initialization);

	init_obj.register_initializer(initialize_example_module);
	init_obj.register_terminator(uninitialize_example_module);
	init_obj.set_minimum_library_initialization_level(MODULE_INITIALIZATION_LEVEL_SCENE);

	return init_obj.init();
}
}
解读上述代码:
-
initialize_example_module、uninitialize_example_module:分别在Godot进行加载或卸载我们的GDExtension时执行。目前在这里所做的只是解析绑定模块中的函数以初始化它们,但您可能需要根据需要,设置更多内容。我们为库中的每个类调用该函数
register_class 。 -
最重要的是第三个函数
example_library_init,该函数可以认为是插件的入口,后续会在配置文件(xxx.gdextension)中标注出来。这个函数进行了如下工作:
-
注册
加载时需要执行的操作initialize_example_module -
注册
卸载时需要执行的操作uninitialize_example_module -
设置
初始化级别(level of initialization)涉及(core(核心), servers(服务器), scene(场景), editor(编辑器), level(级别))注:官方文档中对此没有更多说明,本文作者猜测涉及到插件在何时初始化的时机设置
-
创建对应的头文件register_types.h
#ifndef GDEXAMPLE_REGISTER_TYPES_H
#define GDEXAMPLE_REGISTER_TYPES_H

#include <godot_cpp/core/class_db.hpp>

using namespace godot;

void initialize_example_module(ModuleInitializationLevel p_level);
void uninitialize_example_module(ModuleInitializationLevel p_level);

#endif // GDEXAMPLE_REGISTER_TYPES_H
编译插件
编译插件需要手工编写SConstruct文件,这并不容易,官方提供一个根据本例硬编码的文件,如下所示:
#!/usr/bin/env python
import os
import sys

env = SConscript("godot-cpp/SConstruct")

# For reference:
# - CCFLAGS are compilation flags shared between C and C++
# - CFLAGS are for C-specific compilation flags
# - CXXFLAGS are for C++-specific compilation flags
# - CPPFLAGS are for pre-processor flags
# - CPPDEFINES are for pre-processor defines
# - LINKFLAGS are for linking flags

# tweak this if you want to use different folders, or more folders, to store your source code in.
env.Append(CPPPATH=["src/"])
sources = Glob("src/*.cpp")

if env["platform"] == "macos":
    library = env.SharedLibrary(
        "demo/bin/libgdexample.{}.{}.framework/libgdexample.{}.{}".format(
            env["platform"], env["target"], env["platform"], env["target"]
        ),
        source=sources,
    )
else:
    library = env.SharedLibrary(
        "demo/bin/libgdexample{}{}".format(env["suffix"], env["SHLIBSUFFIX"]),
        source=sources,
    )

Default(library)
将改文件放入项目根目录,即gdextension_cpp_example/,与godot-cpp,src,demo同级,然后开始执行编译操作,执行如下命令
scons platform=<platform>
你现在应该能够在demo/bin/<platform> 中找到该模块.
在这里,我们将 godot-cpp 和我们的 gdexample 库编译为调试版本。对于优化的构建,应使用
target=template_release开关进行编译。
使用GDExtension模块
终于,我们可以使用自己编译的插件了,再回到Godot之前,我们需要在demo/bin/中创建一个文件
这个文件让Godot知道,在不同平台应该从哪里拿到不同的动态库文件,同时声明模块的入口函数,函数定义在编写注册函数中。
[configuration]

entry_symbol = "example_library_init"
compatibility_minimum = "4.2"

[libraries]

macos.debug = "res://bin/libgdexample.macos.template_debug.framework"
macos.release = "res://bin/libgdexample.macos.template_release.framework"
windows.debug.x86_32 = "res://bin/libgdexample.windows.template_debug.x86_32.dll"
windows.release.x86_32 = "res://bin/libgdexample.windows.template_release.x86_32.dll"
windows.debug.x86_64 = "res://bin/libgdexample.windows.template_debug.x86_64.dll"
windows.release.x86_64 = "res://bin/libgdexample.windows.template_release.x86_64.dll"
linux.debug.x86_64 = "res://bin/libgdexample.linux.template_debug.x86_64.so"
linux.release.x86_64 = "res://bin/libgdexample.linux.template_release.x86_64.so"
linux.debug.arm64 = "res://bin/libgdexample.linux.template_debug.arm64.so"
linux.release.arm64 = "res://bin/libgdexample.linux.template_release.arm64.so"
linux.debug.rv64 = "res://bin/libgdexample.linux.template_debug.rv64.so"
linux.release.rv64 = "res://bin/libgdexample.linux.template_release.rv64.so"
android.debug.x86_64 = "res://bin/libgdexample.android.template_debug.x86_64.so"
android.release.x86_64 = "res://bin/libgdexample.android.template_release.x86_64.so"
android.debug.arm64 = "res://bin/libgdexample.android.template_debug.arm64.so"
android.release.arm64 = "res://bin/libgdexample.android.template_release.arm64.so"
这个文件中我们需要关注如下信息
-
configuration中定义了兼容的Godot最低版本,填写该字段防止旧版本Godot加载你的插件 - 该
libraries 部分是重要的部分:它告诉 Godot 每个受支持平台的动态库在项目文件系统中的位置。这也将导致在导出项目时仅导出该文件,这意味着数据包将不包含与目标平台不兼容的库。 - 最后,该
dependencies 部分允许您声明还应包含的其他动态库。当您的GDExtension插件实现其他人的库并要求您为项目提供第三方动态库时,这一点很重要。
现在我们的项目结构看起来应该像这样:
gdextension_cpp_example/
|
+--demo/                  # game example/demo to test the extension
|   |
|   +--main.tscn
|   |
|   +--bin/
|       |
|       +--gdexample.gdextension
|
+--godot-cpp/             # C++ bindings
|
+--src/                   # source code of the extension we are building
|   |
|   +--register_types.cpp
|   +--register_types.h
|   +--gdexample.cpp
|   +--gdexample.h
添加我们的插件
现在在节点中就可以找到我们的插件GDExample

我们加入该节点,并进行如下设置:对Sprite2d添加Texture,同时取消勾选Offset/Centered

此时我们可以运行我们的项目:
自定义编辑器图标
默认情况下, Godot 使用 GDExtension 节点的场景停靠栏中的节点图标.可以通过 gdextension 文件添加自定义图标。节点的图标是通过引用其名称和 SVG 文件的资源路径来设置的。
例如
[icons]

GDExample = "res://icons/gd_example.svg"
参考资料
[官方资料]GDExtension C++ 示例