WPF-配置文件保存和读取
方法一:属性-设置
1,在项目工程名称上》右键属性》设置
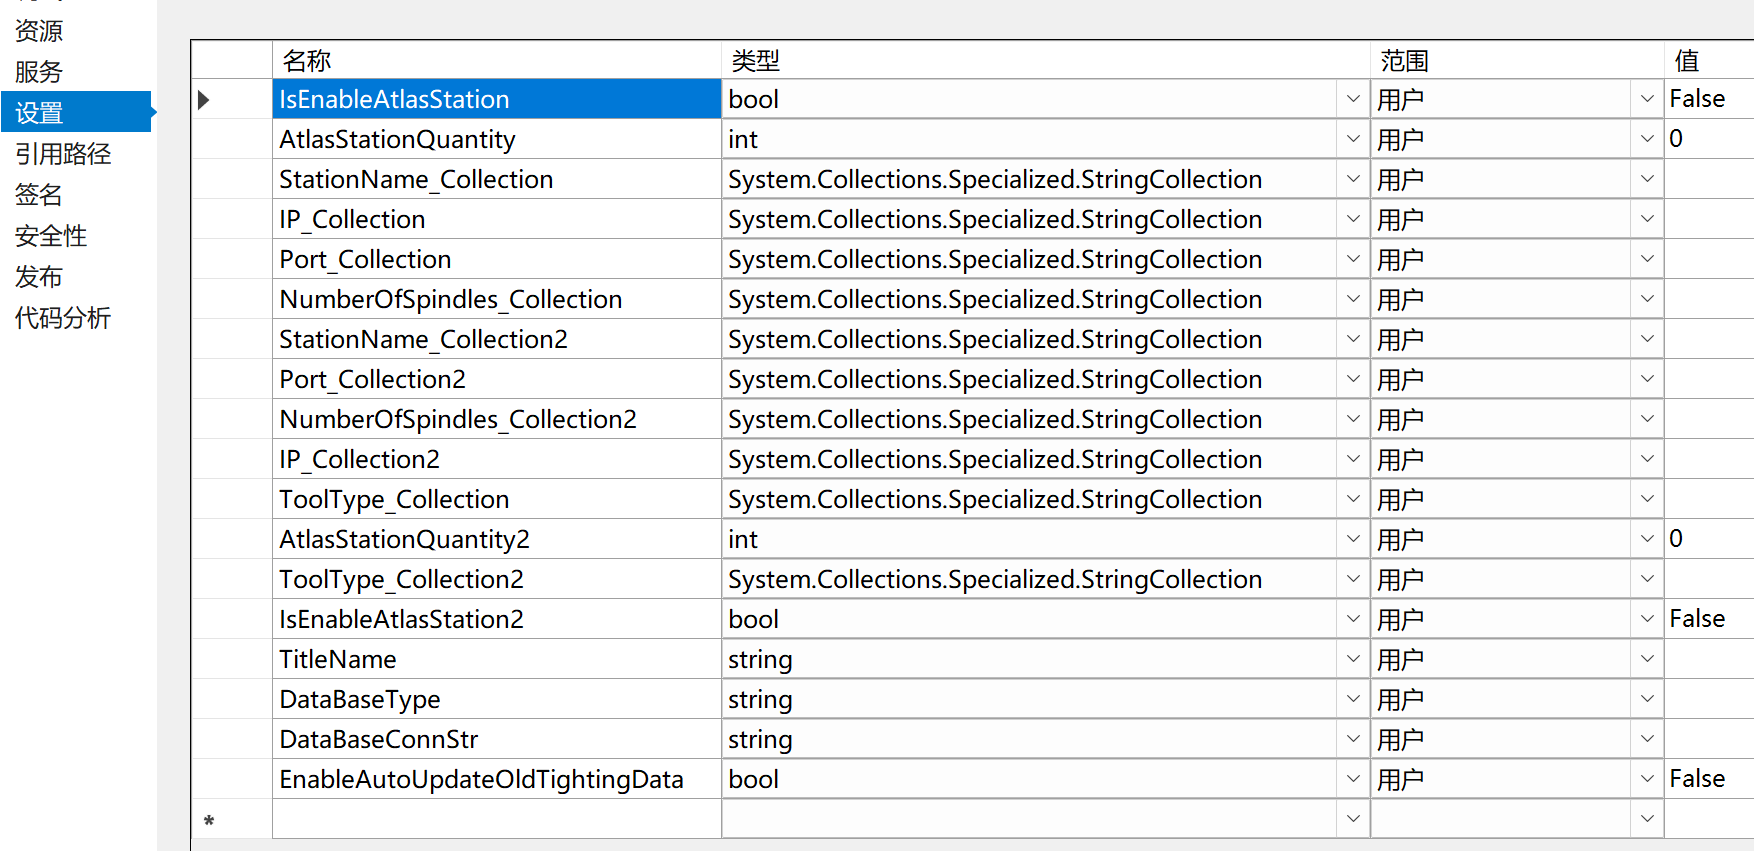
2,设置和保存(保存按钮对应的代码)
        private void Btn_save_Click(object sender, RoutedEventArgs e)
        {
            int quantity = 0;
            int.TryParse(txt_ToolQuantity.Text.Trim(), out quantity);
            if (quantity > 9)
            {
                System.Windows.MessageBox.Show("工具数量最大为9", "提示");
            }
            else if (quantity<=0)
            {
                System.Windows.MessageBox.Show("工具数量不能为0", "提示");
            }
            else
            {
                if (chk_EnableAtlasStation.IsChecked == true)
                {
                    Properties.Settings.Default.IsEnableAtlasStation = true;
                }
                else
                {
                    Properties.Settings.Default.IsEnableAtlasStation = false;
                }
                //if(chk_EnableAutoUpdateOldTightingData.IsChecked == true)
                //{
                //    Properties.Settings.Default.EnableAutoUpdateOldTightingData = true;
                //}
                //else
                //{
                //    Properties.Settings.Default.EnableAutoUpdateOldTightingData = false ;
                //}

                Properties.Settings.Default.AtlasStationQuantity = quantity;
                Properties.Settings.Default.Save();
                Toast.Show("保存成功,重启生效", new ToastOptions { Icon = ToastIcons.Information, Location = ToastLocation.OwnerCenter, Time = 1000, Width = 200, Height = 50 });
            }
        }
3,读取参数
            int ATtoolQuantitis = Properties.Settings.Default.AtlasStationQuantity;

            bool isenable = Properties.Settings.Default.IsEnableAtlasStation;

            bool isAutoUploadOldData= Properties.Settings.Default.EnableAutoUpdateOldTightingData;


            txt_ToolQuantity.Text = ATtoolQuantitis.ToString();

            chk_EnableAtlasStation.IsChecked = isenable ? true : false;
方法二:使用AutoMapper
参考:WPF 分享一种设置程序保存配置文件的方法 | 配置 (lmlphp.com)
1,XMAL页面
                    <CheckBox Margin="5,2" IsChecked ="{Binding IsUploadData}" Content="数据上传" />
                    <ComboBox SelectedValue="{Binding APIType}" ItemsSource="{Binding APITypeList}" Width="200" Margin="5,0"/>
                    <TextBox Text="{Binding APIUrl}"   Width="200" Margin="5,0"/>
2,新建2个Model:SettingModel和SettingModelBack
    public class SettingModel : ObservableObject

    {
        private bool _IsUploadData;

        public bool IsUploadData

        {
            get { return _IsUploadData; }

            set { _IsUploadData = value; RaisePropertyChanged("IsUploadData"); }
        }

        private string _APIType;

        public string APIType

        {
            get { return _APIType; }

            set { _APIType = value; RaisePropertyChanged("APIType"); }
        }

        private List<string> _APITypeList;

        public List<string> APITypeList

        {
            get { return _APITypeList; }

            set { _APITypeList = value; RaisePropertyChanged("APITypeList"); }
        }

        private string _APIUrl;

        public string APIUrl

        {
            get { return _APIUrl; }

            set { _APIUrl = value; RaisePropertyChanged("APIUrl"); }
        }

        private string _DBType;

        public string DBType

        {
            get { return _DBType; }

            set { _DBType = value; RaisePropertyChanged("DBType"); }
        }
    }
因为使用了MVVM,Model都实现了INotifyPropertyChanged接口,不可以序列化。是我们需要再添加一个Model,结构和SettingModel一样,但是不实现INotifyPropertyChanged接口。此Model类上添加 [Serializable]标记
这样我们在保存时,需要将SettingModel的数据赋给SettingModelBack,我们可以用AutoMapper来实现,很方便。
    [Serializable]
    public class SettingModelBack

    {
        private bool _IsUploadData;

        public bool IsUploadData

        {
            get { return _IsUploadData; }

            set { _IsUploadData = value; }
        }

        private string _APIType;

        public string APIType

        {
            get { return _APIType; }

            set { _APIType = value; }
        }

        private List<string> _APITypeList;

        public List<string> APITypeList

        {
            get { return _APITypeList; }

            set { _APITypeList = value; }
        }

        private string _APIUrl;

        public string APIUrl

        {
            get { return _APIUrl; }

            set { _APIUrl = value; }
        }

        private string _DBType;

        public string DBType

        {
            get { return _DBType; }

            set { _DBType = value; }
        }
    }
3,引入AutoMapper.dll 版本:8.0.0.0,在程序的入口或主窗体的构造函数中添加
            //设置或注册,在使用 Map 方法之前,首先要告诉 AutoMapper 什么类可以映射到什么类,
            //这个方法只能执行一次,再次执行会报错,所以要放在主程序的入口
            Mapper.Initialize(m => m.CreateMap<SettingModel, SettingModelBack>());
4,保存按钮
            //保存时,需要将SettingModel的数据赋给SettingModelBack
            var config = AutoMapper.Mapper.Map<SettingModelBack>(this.DataContext);
            //序列化SettingModelBack保存在文件
            SerializeHelper.MySerialize<SettingModelBack>(config);
5,读取参数配置
        public SystemConfiguration()
        {
            InitializeComponent();

            DataContext = new SettingModel();

            //读取配置文件(反序列化为SettingModelBack对象)
            var configData = SerializeHelper.MyBackSerialize<SettingModelBack>();
            configData.APITypeList = new List<string> { "WebApi", "WebService" };//Combobox添加默认选项
            //将SettingModelBack映射到SettingModel,赋值给DataContext,页面打开后就显示配置文件中的储存值啦。
            DataContext = AutoMapper.Mapper.Map<SettingModel>(configData);
        }
总结:这种保存配置文件的方式,有个好处就是如果有新的配置项需要保存,我们只需要在Model中添加相应的属性,并绑定到界面上(WPF本来也需要做这个事)