springboot 分析源码欢迎页和图标-> thymeleaf模板引擎常用语法->扩展
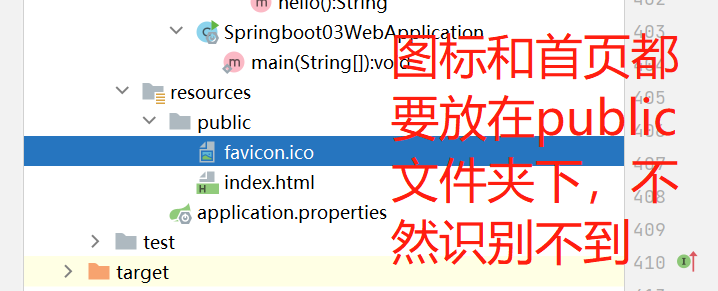
欢迎页:

icon:
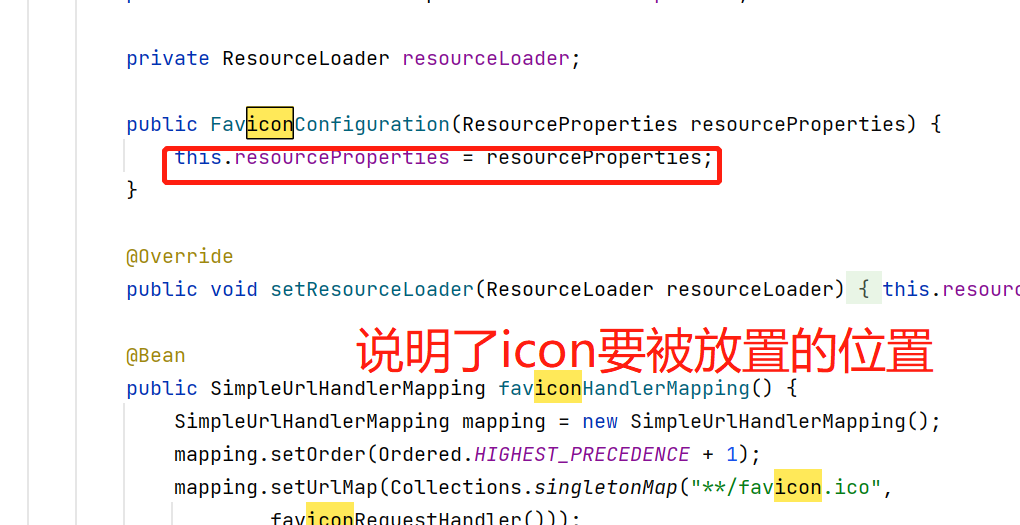
注意点:
thymeleaf模板引擎
1.使用thymeleaf模板引擎前要导入对应依赖包
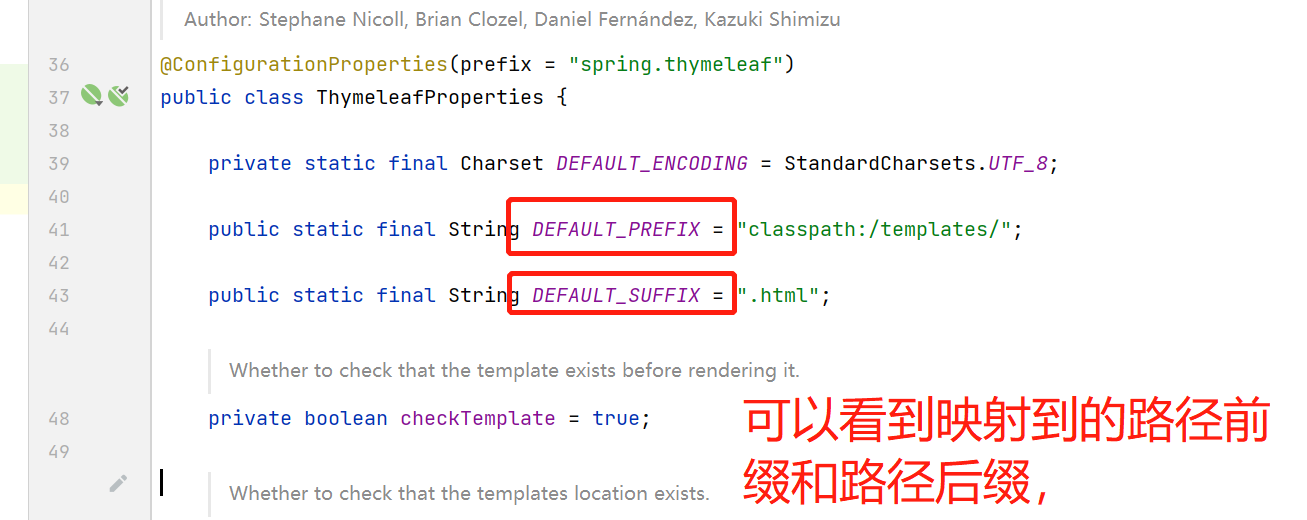
2.阅读源码:
根据源码说明我们可以将html文件放置在templates目录下,然后通过controller进行跳转即可
controller类:


//在templates下的东西需要通过controller类来跳转,
// 需要导入thymeleaf对应的依赖包
@Controller
public class IndexController {
    //跳转到templates目录下的测试页面
    @RequestMapping("/t")
    public String test1(){
        return "test";
    }
}
结果:

thymeleaf语法介绍
这里测试一下在controller类设置一个属性给前端接收并展示,
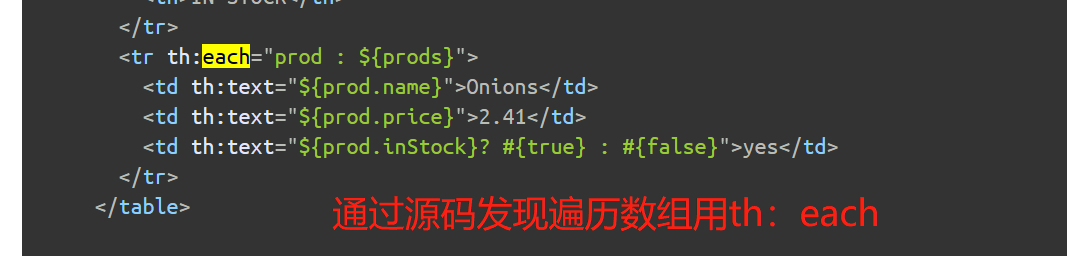
首先要搞清楚在thymeleaf中是如何在前端页面展示接收到的数据的,查看源码发现标签th:text和th:each
html代码:
<!DOCTYPE html>
<html lang="en">
<head>
    <meta charset="UTF-8">
    <title>Title</title>
</head>
<body>
<h1>test thymeleaf!!</h1>
<div th:text="${msg}"></div>
<div th:each="user:${users}" th:text="${user}"></div>
</body>
</html>
controller测试代码:
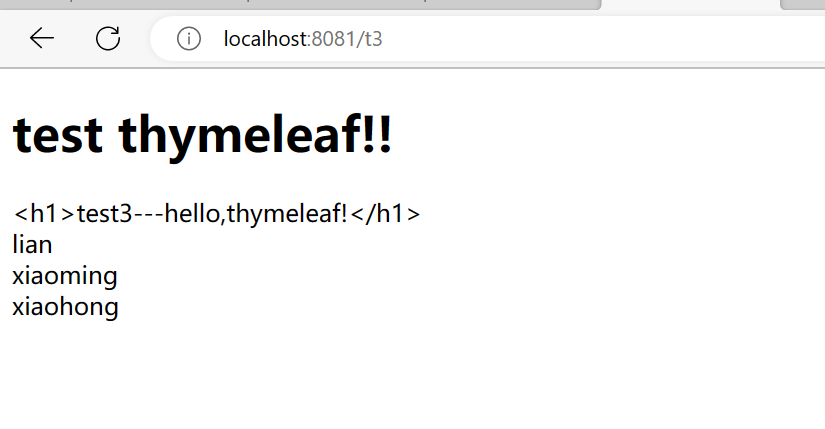
//在templates下的东西需要通过controller类来跳转,
// 需要导入thymeleaf对应的依赖包
@Controller
public class IndexController {
    //跳转到templates目录下的测试页面
    @RequestMapping("/t1")
    public String test1(){
        return "test";
    }
    @RequestMapping("/t2")
    public String test2(Model model){
        //在这里设置一个属性给前端接收并展示
        model.addAttribute("msg","test2---hello,thymeleaf!");
        return "test";

    }
    @RequestMapping("/t3")
    public String test3(Model model){
        //在这里设置一个属性给前端接收并展示
        model.addAttribute("msg","<h1>test3---hello,thymeleaf!</h1>");
        model.addAttribute("users", Arrays.asList("lian","xiaoming","xiaohong"));
        return "test";
    }
}
运行结果(部分):
总结一些常用的thymeleaf标签:
th:text="${emp.getId()}" 将数据以文本形式展示在前端
th:each="emp:${emps}"遍历列表emps中的每一项
th:checked="${emp.getGender()==0}"判断,暂时不清楚
th:value="${#dates.format(emp.getBirth(),'yyyy-MM-dd')}" 暂时不太清楚,暂且理解的是取出数据传递给后端