sg90舵机+esp8266+点灯科技 小爱语音控制开关灯
网上做烂了好几年的项目 好久前就看到了 今天实现下
关于智能开关 什么通断器+凌动开关 什么绿米开关不买单火控制 什么断网就废买新中枢网关
这些都不实际 原有家庭电路 如果真加上这些是一笔不小的开销
真要实现 建议从装修房子 布线家庭电路前就考虑好 避免二次加工
这里适合自己房间或学校寝室使用哈
演示
开灯
关灯

一、材料
- esp8266 nodemcu ch340开发板 x1 13元
- 塑料sg90舵机 x1 6元
二、工具
- 焊笔 热熔胶
三、步骤
-
运行usb转串口通用驱动
https://wwkx.lanzouw.com/iuuod14mikxe 密码:ezxx -
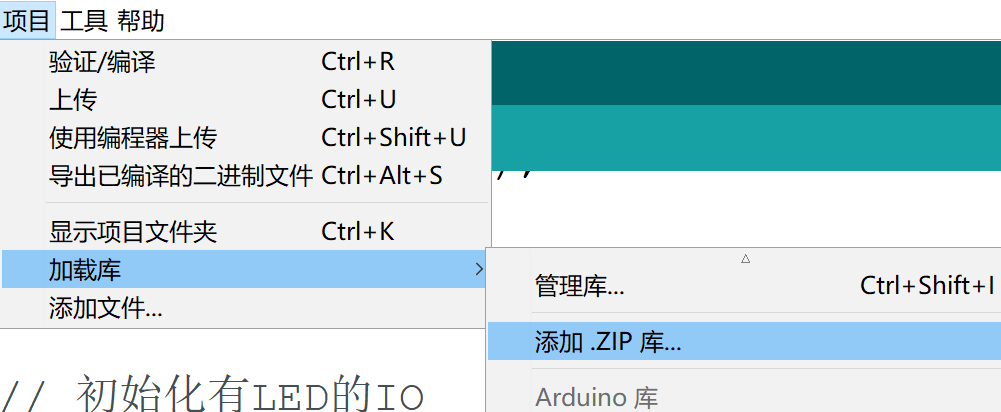
arduino添加点灯库
打开 https://www.diandeng.tech/dev 找到第一个c++下载完zip
选择库zip上传
-
arduino首选项添加
http://arduino.esp8266.com/stable/package_esp8266com_index.json
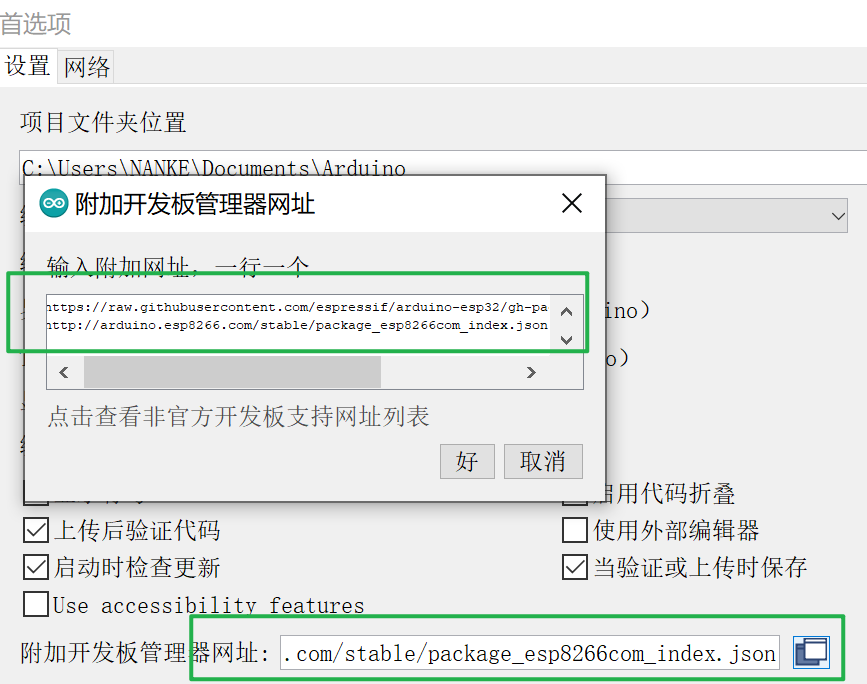
然后去开发板管理器选择esp8266 3.0.1下载安装
-
开发板选择如下

-
添加点灯key(点灯app新建网络设备默认的key) wifi名 wifi密码
-
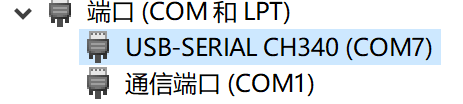
主机连接开发板 选择对应com编译上传 设备管理器查看有无

四、代码
#include <ArduinoOTA.h>

#define BLINKER_WIFI
#define BLINKER_PRINT Serial
#define BLINKER_MIOT_LIGHT

#include <Blinker.h>
#include <Servo.h>

char auth[] = "你的点灯科技key";
char ssid[] = "你的wifi";
char pswd[] = "你的密码";
BlinkerButton Button1("ddl1"); //blinker按键键名
BlinkerButton Button2("ddl2"); //blinker按键键名
Servo servo_14;   //舵机输出口 GIPO14
bool oState = false;

//按键1按下后执行该函数
void button1_callback(const String & state) {
    BLINKER_LOG("get button state: ", state);
   // digitalWrite(LED_BUILTIN, !digitalRead(LED_BUILTIN));
    servo_14.write(45);  //舵机旋转角度 具体参数需要结合自身情况修改
    delay(1);           //给一个小延时
    delay(1000);   //舵机动作后延时一会回到初始位置
    servo_14.write(90); //设置该角度方便手动开关灯 就是开完灯舵机归位
}

//按键2按下执行该函数
void button2_callback(const String & state) {
    BLINKER_LOG("get button state: ", state);
    servo_14.write(135);  //同上一样的思路
    delay(1);
    delay(1000);
    servo_14.write(90);
}

//小爱电源回调函数
//里面同样设置舵机的动作
void miotPowerState(const String & state)
{
    BLINKER_LOG("need set power state: ", state);
    if (state == BLINKER_CMD_ON) {
       // digitalWrite(LED_BUILTIN, HIGH);
         servo_14.write(45);
         delay(1);
         delay(1000);
         servo_14.write(90);
        BlinkerMIOT.powerState("on");
        BlinkerMIOT.print();
    }
    else if (state == BLINKER_CMD_OFF) {
      //  digitalWrite(LED_BUILTIN, LOW);
        servo_14.write(135);
         delay(1);
         delay(1000);
         servo_14.write(90);
        BlinkerMIOT.powerState("off");
        BlinkerMIOT.print();
    }
}


void miotQuery(int32_t queryCode)
{
    BLINKER_LOG("MIOT Query codes: ", queryCode);

    switch (queryCode)
    {
        case BLINKER_CMD_QUERY_ALL_NUMBER :
            BLINKER_LOG("MIOT Query All");
            BlinkerMIOT.powerState(oState ? "on" : "off");
            BlinkerMIOT.print();
            break;
        case BLINKER_CMD_QUERY_POWERSTATE_NUMBER :
            BLINKER_LOG("MIOT Query Power State");
            BlinkerMIOT.powerState(oState ? "on" : "off");
            BlinkerMIOT.print();
            break;
        default :
            BlinkerMIOT.powerState(oState ? "on" : "off");
            BlinkerMIOT.print();
            break;
    }
}

void dataRead(const String & data)
{
    BLINKER_LOG("Blinker readString: ", data);

    Blinker.vibrate();

    uint32_t BlinkerTime = millis();
    Blinker.print(BlinkerTime);
    Blinker.print("millis", BlinkerTime);
}


void setup()
{
    Serial.begin(115200);

    BLINKER_DEBUG.stream(Serial);

    // 初始化有LED的IO
    //这里初始话后没有调用板子自带的led
    pinMode(LED_BUILTIN, OUTPUT);
    servo_14.attach(14);


    digitalWrite(LED_BUILTIN, HIGH);
    // 初始化blinker
    Blinker.begin(auth, ssid, pswd);
    BlinkerMIOT.attachQuery(miotQuery);
    Blinker.attachData(dataRead);
    BlinkerMIOT.attachPowerState(miotPowerState);
    Button1.attach(button1_callback);
    Button2.attach(button2_callback);
}

void loop()
{
    Blinker.run();
}
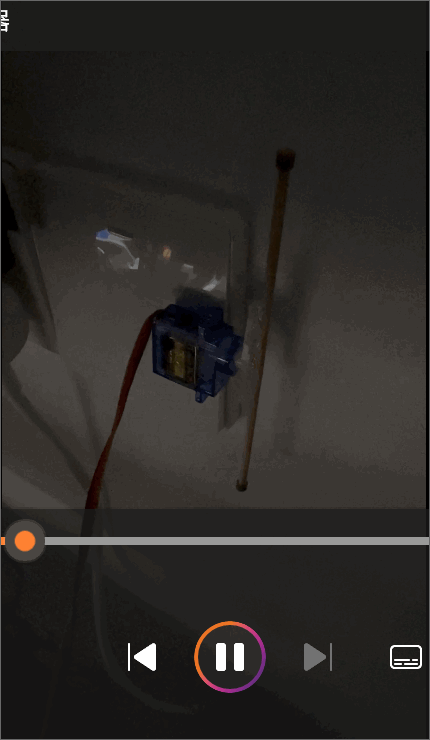
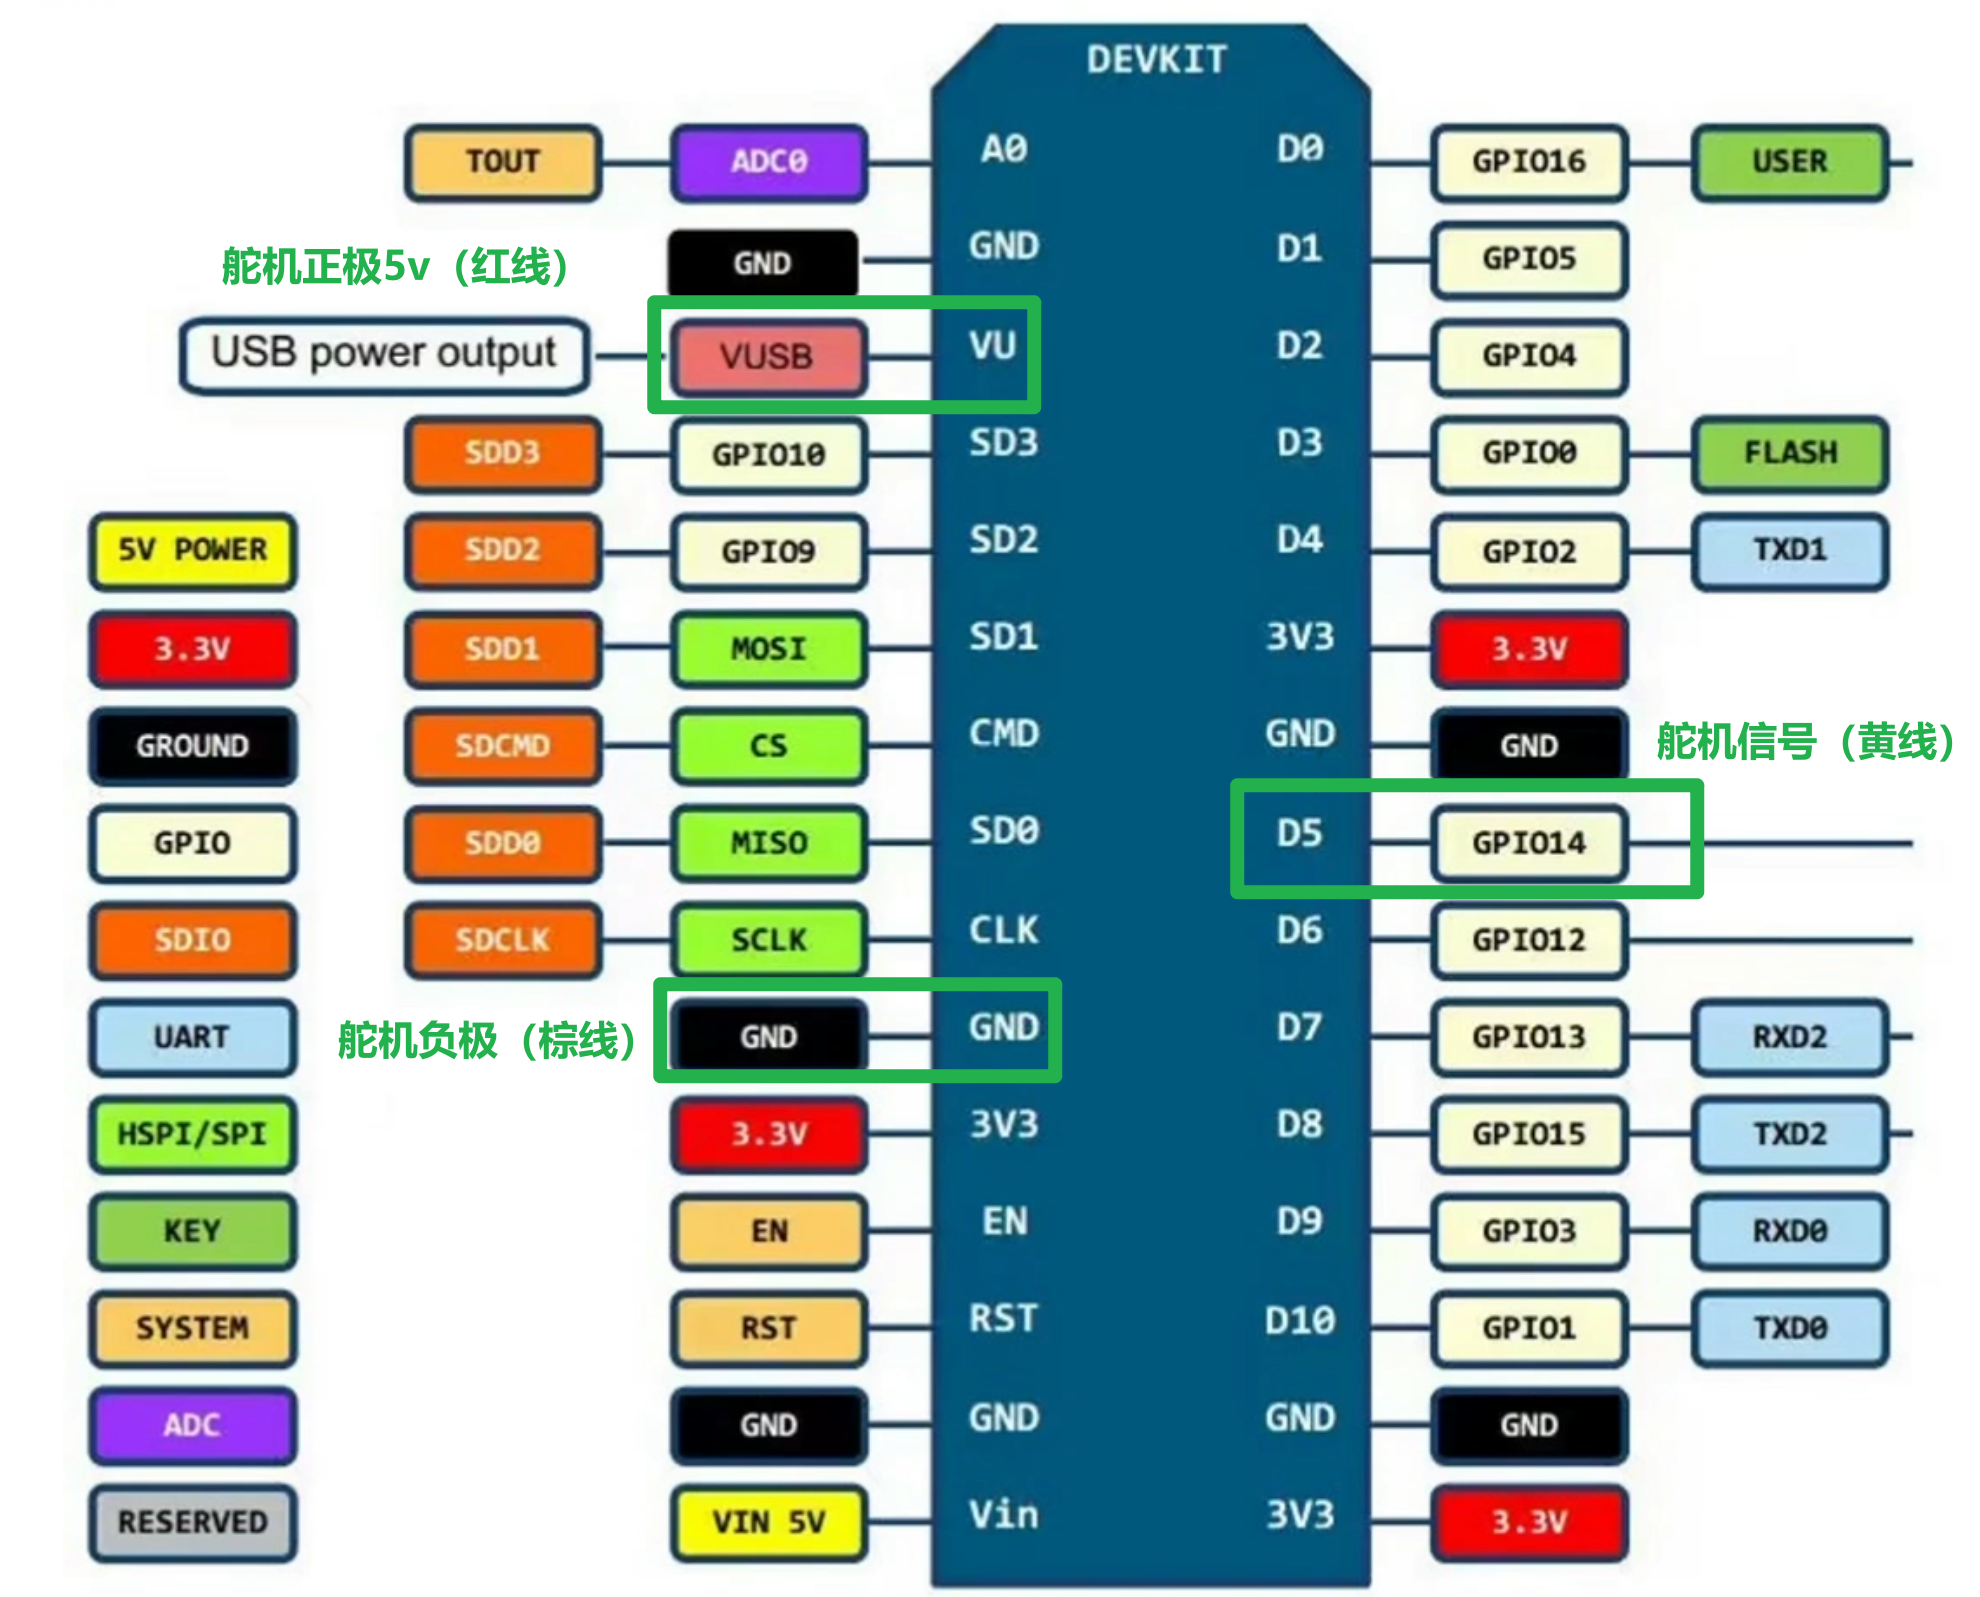
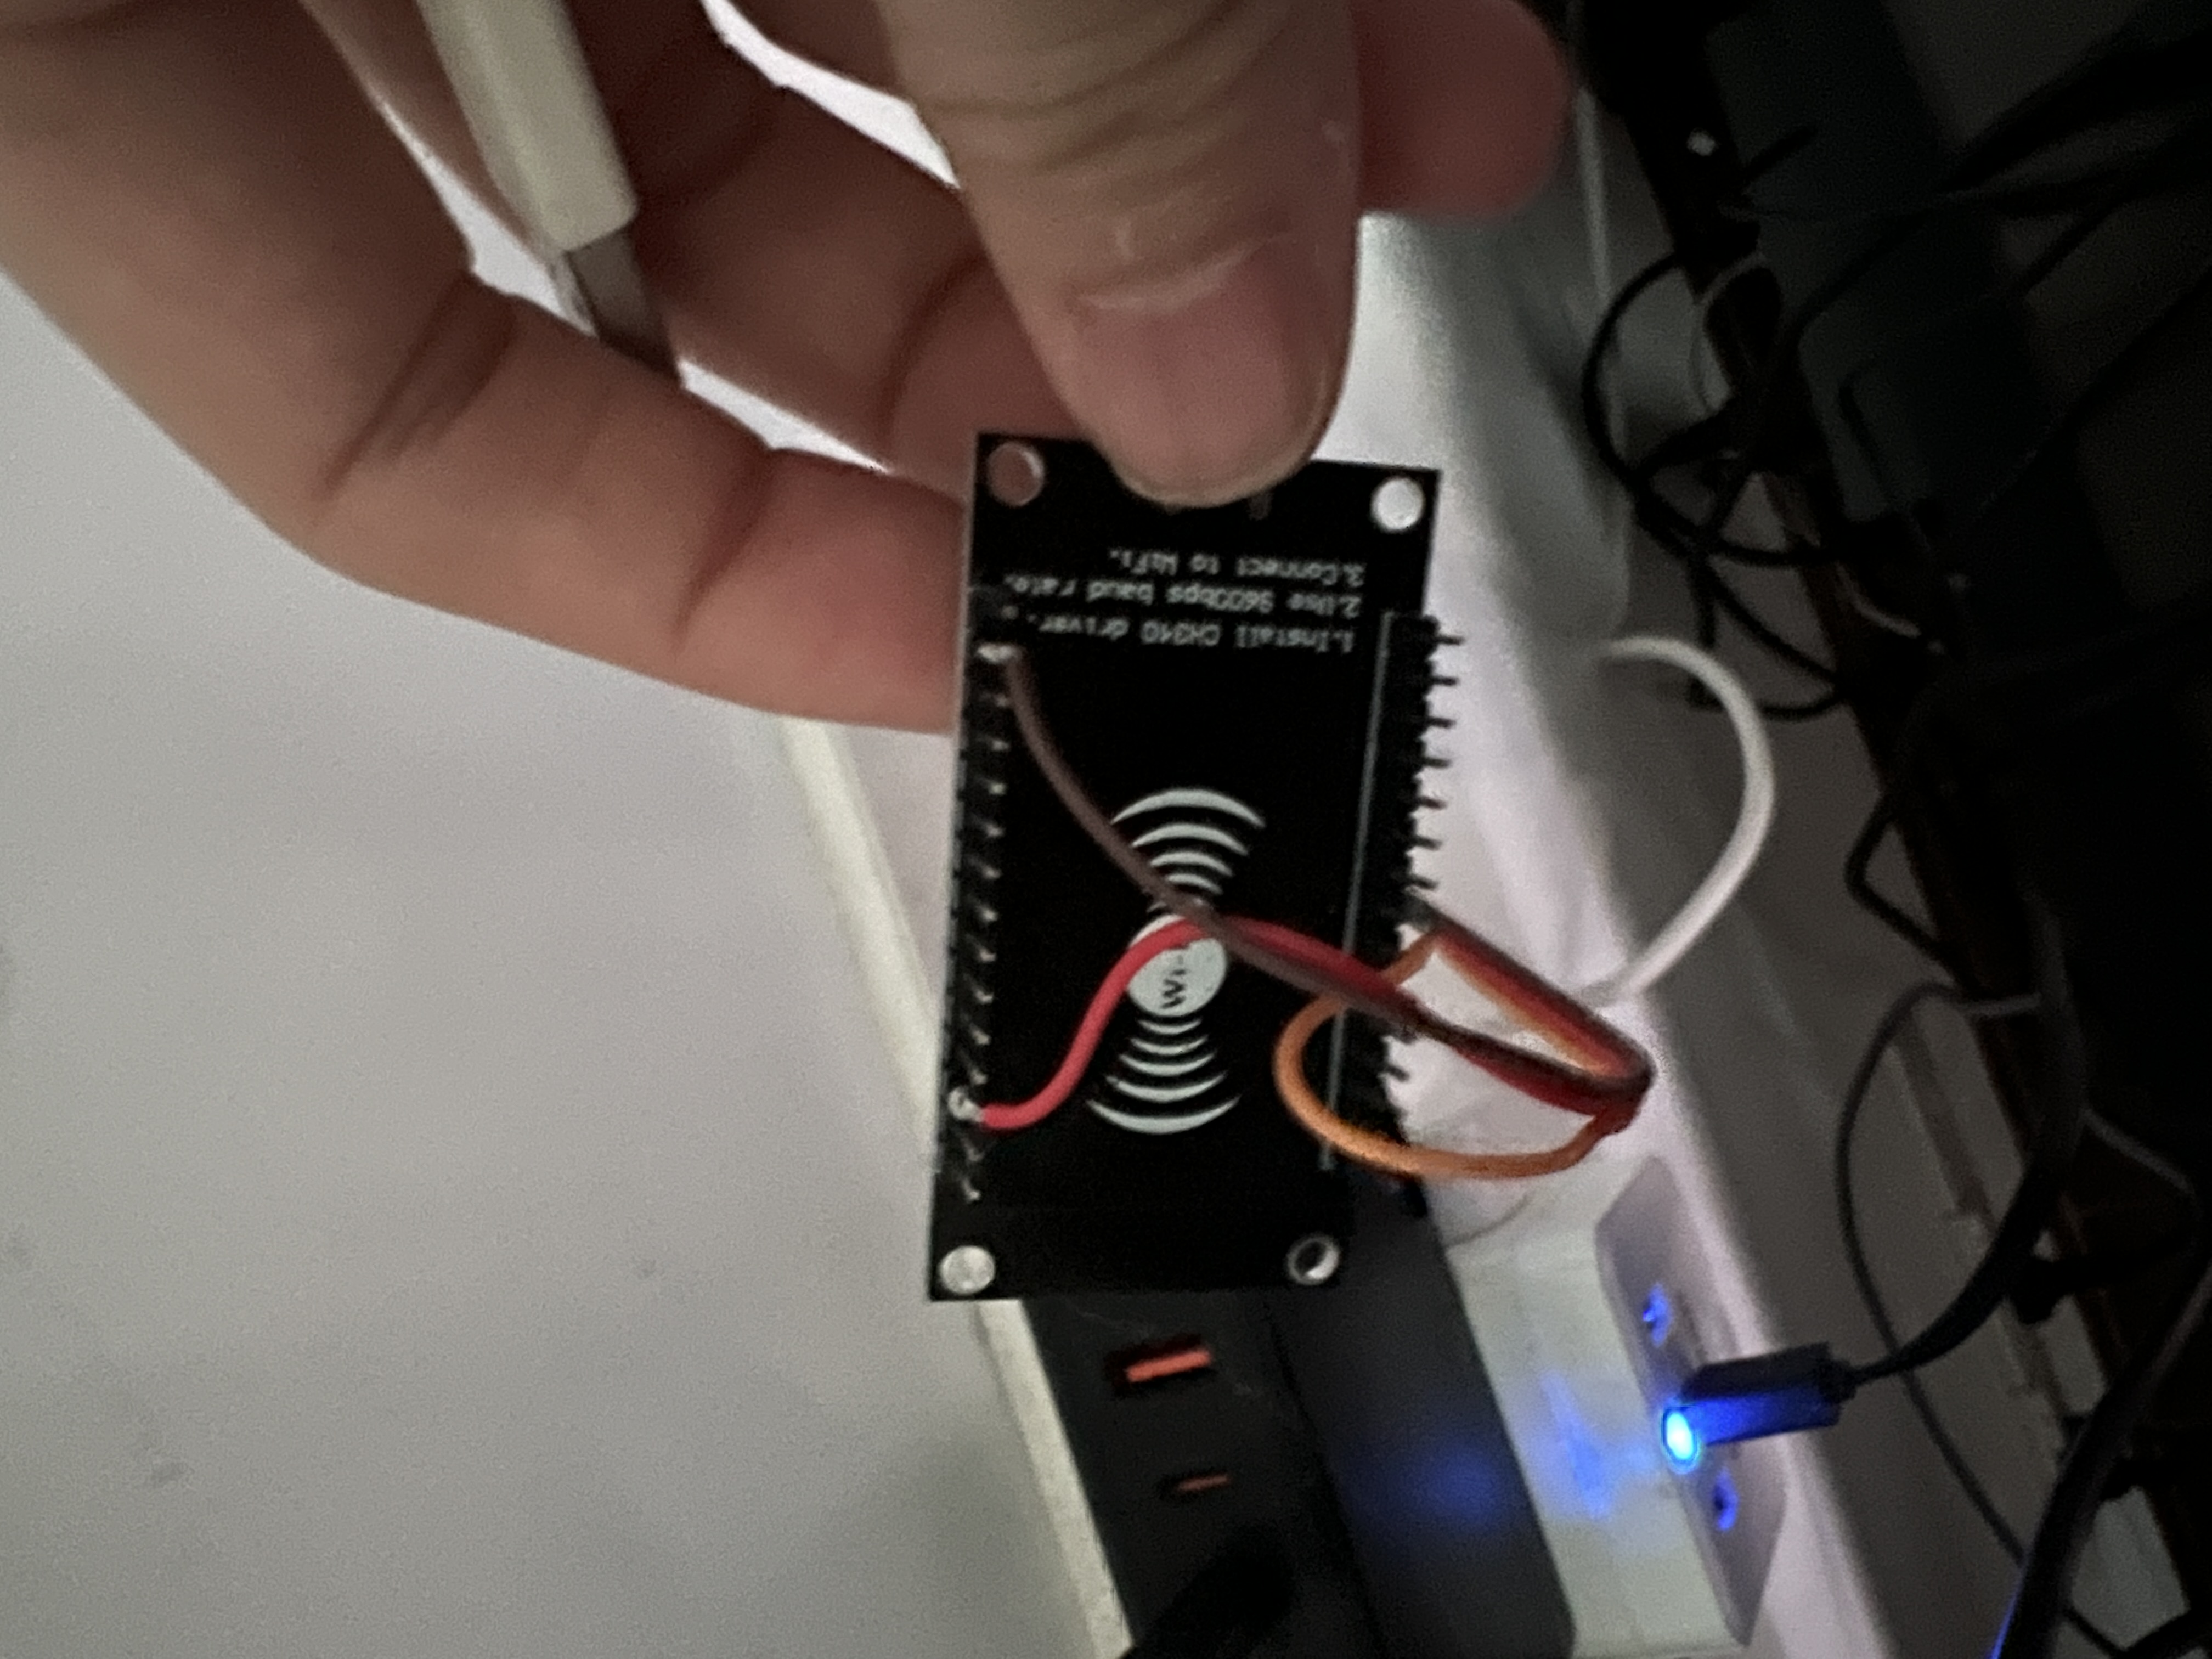
五、接线
信号线d5(舵机黄色)
正极(开发板5v)
负极(任意gnd)
六、参考
https://blog.csdn.net/qq_45664055/article/details/126986854