从零开始使用vue2+element搭建后台管理系统(前期准备)
准备开始
1. 安装node (node -v查询版本号) (下载地址:https://nodejs.org/en/download/)
2. 安装淘宝镜像 npm install -g cnpm --registry=https://registry.npm.taobao.org
3. 安装 webpack,以全局的方式安装 npm install webpack -g
4.全局安装vue以及脚手架vue-cli npm install @vue/cli -g --unsafe-perm
5.创建vue项目 vue create 项目名称
项目前置配置
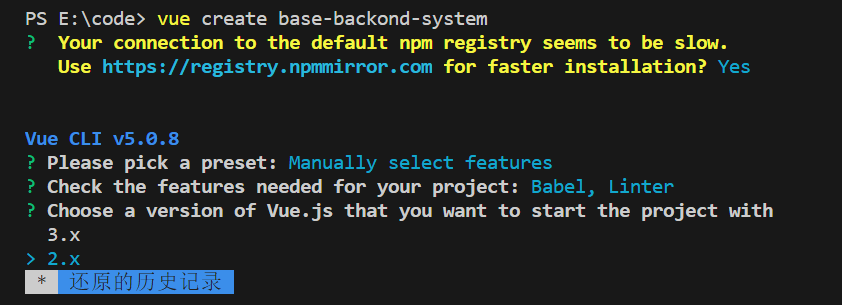
- 选择预设模板:Manually select features:手动配置
- 选择需要使用的特性:Babel,Router,Vuex,CSS Pre-processors,Linter / Formatter(单元、E2E测试不选,ts根据项目情况选)
- Router 选择路由模式:选用history(URL 中不带有 # 符号,但需要后台配置支持)
- 选择 CSS Pre-processors:Sass(因为element使用Sass)
- 选择 Linter / Formatter(Pick a linter / formatter config: (Use arrow keys):这里我试着选了ESLint + Prettier,通常选择ESLint + Standard config
- 选择在什么时间进行检测(Pick additional lint features: (Press <space> to select, <a> to toggle all, <i> to invert selection)):
- Lint on save:保存时检测(√)
- Lint and fix on commit:提交时检测
- 选择在什么位置保存配置文件(Where do you prefer placing config for Babel, PostCSS, ESLint, etc.? (Use arrow keys)):In dedicated config files
- 选择是否保存本次配置以便于下次使用(Save this as a preset for future projects? (y/N)):N
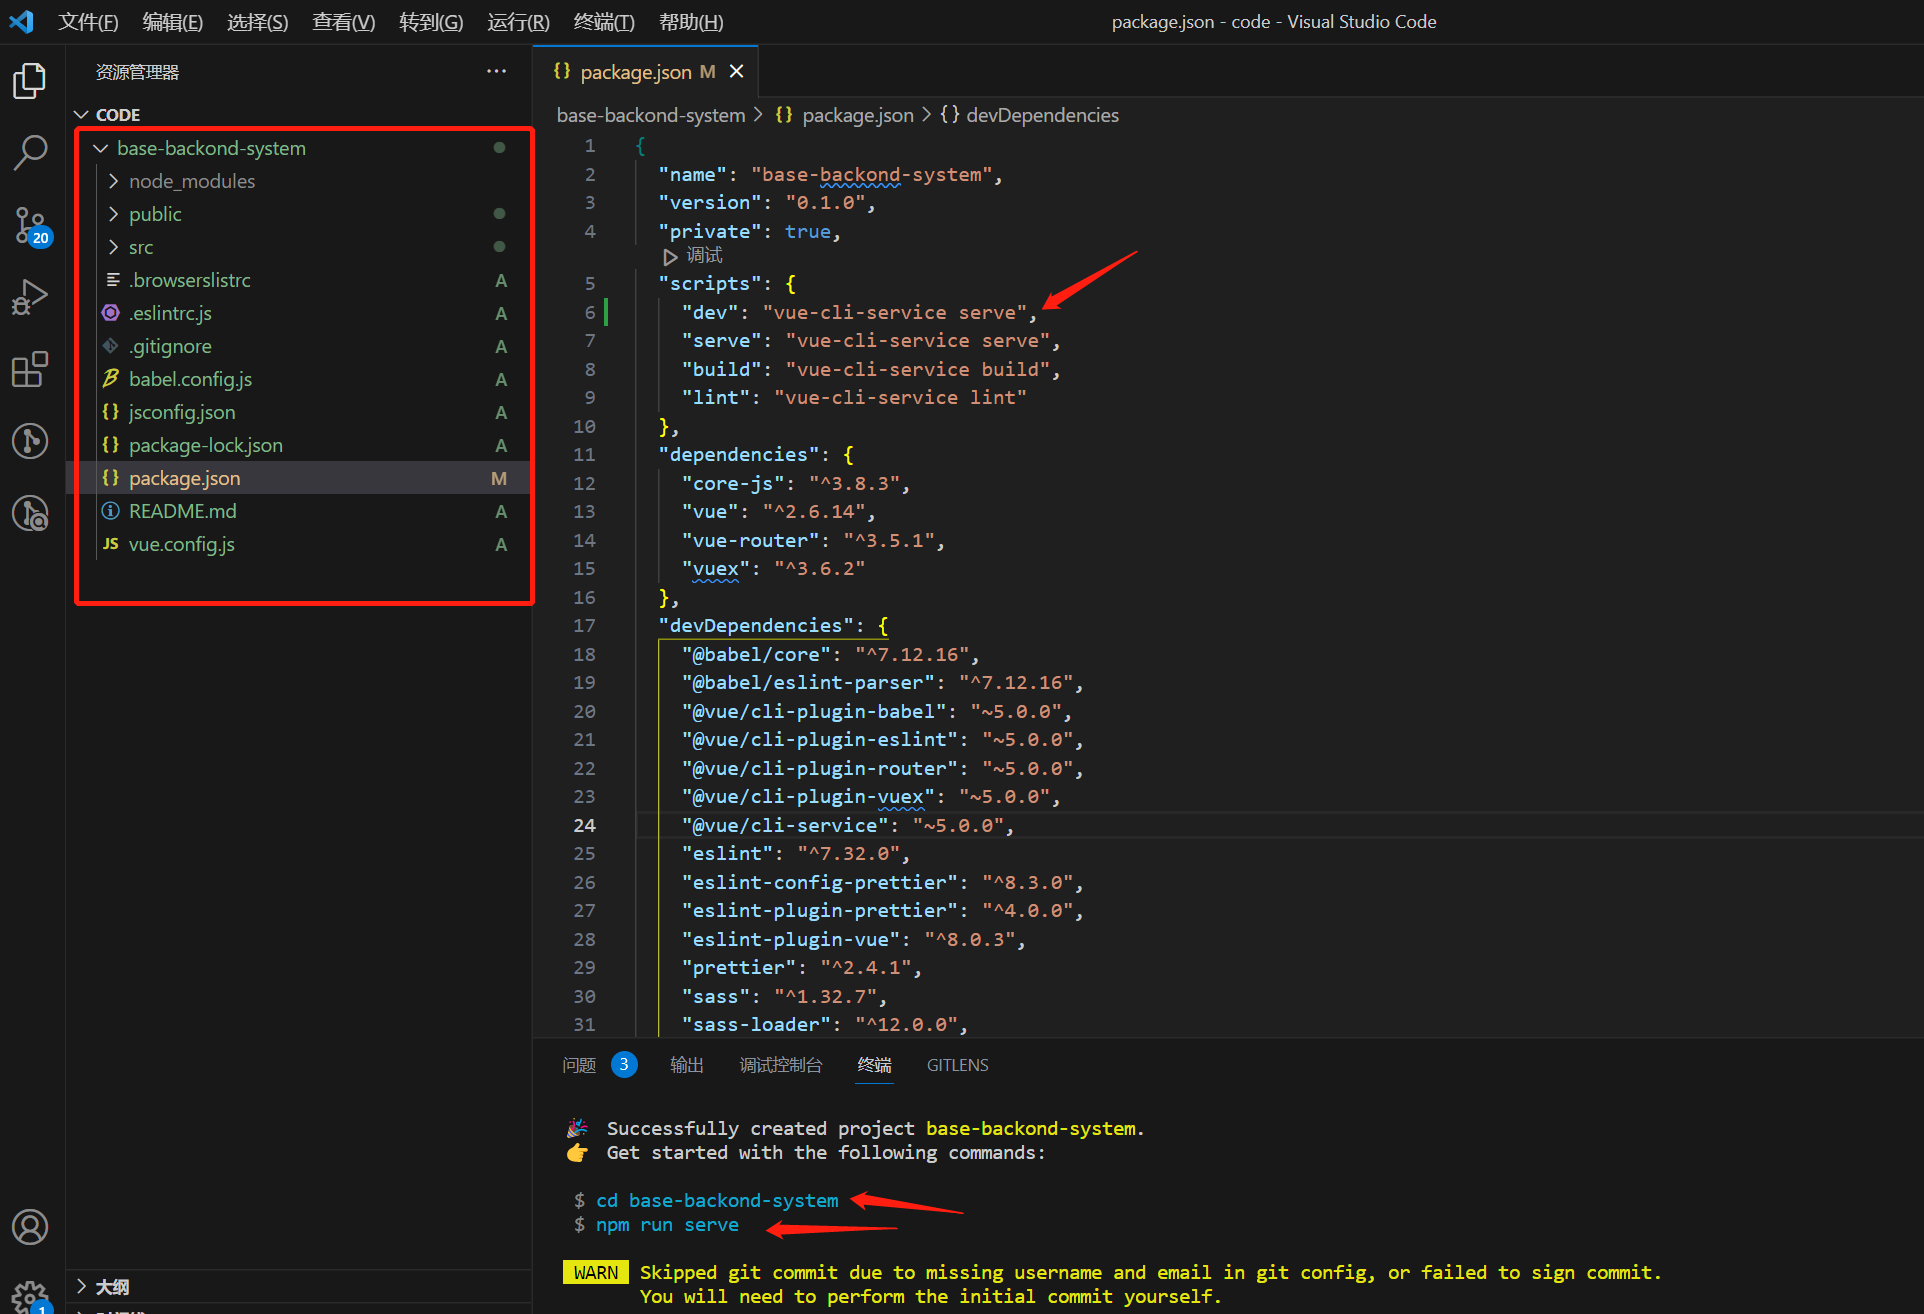
配置好后,会自动生成一个项目,根据终端的提示,cd进入项目后,执行npm run serve,本地环境的运行命令可以自己配
导入element
官方文档:https://element.eleme.cn/#/zh-CN/component/installation
全局导入命令:npm i element-ui -S
在main.js中引入:
import Vue from "vue";
import App from "./App.vue";
import router from "./router";
import store from "./store";
import 'element-ui/lib/theme-chalk/index.css'
import ElementUI from 'element-ui'

Vue.use(ElementUI)
Vue.config.productionTip = false;

new Vue({
  router,
  store,
  render: (h) => h(App),
}).$mount("#app");
创建路由 (router/index.js)
import Vue from "vue";
import VueRouter from "vue-router";
Vue.use(VueRouter);
import LoginView from "../views/LoginView.vue";
/**
 * 处理控制台的报错
 * Uncaught (in promise) NavigationDuplicated: Avoided redundant navigation to current location: "/home/list".
 * 添加以下代码
 */
const originalPush = VueRouter.prototype.push;
VueRouter.prototype.push = function push(location) {
  return originalPush.call(this, location).catch((err) => err);
};
export const constantRoutes = [
  // 重定向
  {
    path: "/",
    redirect: "/login",
  },
  //login
  {
    path: "/login",
    component: LoginView,
  },
];

const createRouter = () =>
  new VueRouter({
    mode: "history",
    base: process.env.BASE_URL,
    scrollBehavior: () => ({
      y: 0,
    }),
    routes: constantRoutes,
  });

const router = createRouter();

export default router;
引入axios
官网::http://www.axios-js.com/ (基于Promise的HTTP客户端,用于发送HTTP请求)
安装:npm install axios -S
创建一个名为utils的文件夹,在其中创建一个名为request.js的文件:
// 封装请求函数
import axios from "axios";
// 路由守卫
import router from "../router";

// 创建axios实例
const service = axios.create({
  baseURL: process.env.BASE_API,
  timeout: 5000,
});

// 请求拦截器
service.interceptors.request.use(
  (config) => {
    // 判断是否存在token
    if (localStorage.getItem("token")) {
      // 在请求头中携带token
      config.headers.Authorization = localStorage.getItem("token");
    }
    return config;
  },
  (error) => {
    console.log(error);
    Promise.reject(error);
  }
);

// 响应拦截器
service.interceptors.response.use(
  (response) => {
    const res = response.data;
    // 请求成功,返回数据
    if (res.code === 200) {
      return res;
    } else {
      // 根据状态码提示错误信息
      switch (res.code) {
        case 401:
          // 无权限,跳转到登录页面并清除token
          localStorage.removeItem("token");
          router.push("/login");
          break;
        case 403:
          alert("没有操作权限");
          break;
        case 404:
          alert("请求的资源不存在");
          break;
        case 500:
          alert("服务器内部错误");
          break;
        default:
          alert(res.message);
      }
      return Promise.reject(res.message || "Error");
    }
  },
  (error) => {
    console.log("err" + error);
    alert(error.message);
    return Promise.reject(error);
  }
);

export default service;
最后src/main.js文件的内容为:
import Vue from "vue";
import App from "./App.vue";
import router from "./router";
import store from "./store";
import "element-ui/lib/theme-chalk/index.css";
import ElementUI from "element-ui";
import request from "./utils/request";

// 路由守卫
router.beforeEach((to, from, next) => {
  // 判断是否需要登录才能访问该路由
  if (to.meta.requireAuth) {
    console.log(111);
    // 判断是否存在token
    if (localStorage.getItem("token")) {
      next();
    } else {
      console.log(222);
      // 跳转到登录页面
      next({
        path: "/login",
        query: { redirect: to.fullPath },
      });
    }
  } else {
    console.log(333);
    next();
  }
});
Vue.use(ElementUI);
Vue.config.productionTip = false;
Vue.prototype.$http = request;

new Vue({
  router,
  store,
  render: (h) => h(App),
}).$mount("#app");
在views文件夹下创建LoginView.vue:
<template>
  <div class="sign-in">
    <el-row>
      <el-col :span="12" :offset="6">
        <h1>后台系统</h1>
        <el-form
          :model="loginForm"
          :rules="loginRules"
          ref="ruleForm"
          label-width="100px"
          class="demo-ruleForm"
        >
          <el-form-item label="用户名:" prop="name">
            <el-input v-model="loginForm.name"></el-input>
          </el-form-item>
          <el-form-item label="密码:" prop="password">
            <el-input v-model="loginForm.password" type="password"></el-input>
          </el-form-item>
          <el-form-item>
            <el-button type="primary" @click="handleLogin('ruleForm')">
              立即登录
            </el-button>
            <el-button @click="resetForm('ruleForm')">重置</el-button>
          </el-form-item>
        </el-form>
      </el-col>
    </el-row>
  </div>
</template>

<script>
import { login /*setBasicInfo*/ } from "../api/login";
import store from "@/store";
export default {
  data() {
    return {
      loginForm: {
        name: "",
        password: "",
      },
      loginRules: {
        name: [{ required: true, message: "请输入用户名", trigger: "blur" }],
        password: [{ required: true, message: "请输入密码", trigger: "blur" }],
      },
    };
  },
  methods: {
    async handleLogin(formName) {
      this.$refs[formName].validate(async (valid) => {
        if (valid) {
          try {
            const params = {
              data: {
                mobile: this.loginForm?.name,
                password: this.loginForm?.password,
              },
            };
            const res = await login(params);
            console.log(res);
            if (res.code !== 10000) this.$message.error(res.msg || "登录失败!");
            if (res.code === 10000) {
              // 获取用户信息
              this.$message.success(res.msg);
              // const menu = await setBasicInfo();
              await store.dispatch("index/SET_USER");
              // const redirect = menu[0].path + "/" + menu[0].children[0].path;
              // await this.$router.push(redirect);
            }
          } finally {
            //
          }
        } else {
          this.$message.error("输入有误!");
        }
      });
    },

    resetForm(formName) {
      this.$refs[formName].resetFields();
    },
  },
};
</script>

<style scoped lang="scss">
.sign-in {
  padding-top: 100px;
}

h1 {
  text-align: center;
}
</style>
在api文件夹下新建login.js文件,随便写个假的login接口:
/**
 * 登录模块接口列表
 */

// import request from "../utils/request"; // 导入http中创建的axios实例
// import qs from "qs"; // 根据需求是否导入qs模块

export function login(params) {
  console.log(params, "params");
  return {
    code: 10000,
    msg: "yes",
  };
  //   return request.post("api/user/login", qs.stringify(params));
}
运行效果:
