FISCO-BCOS:Java SDK 部署和调用智能合约
工作环境
LINUX:Linux桌面发行版,Ubuntu22.04
JAVA:JDK 11

IDE:IntelliJ IDEA 社区版
搭建一条FISCO BCOS链
参考https://fisco-bcos-documentation.readthedocs.io/zh_CN/latest/docs/installation.html
搭建单群组4节点联盟链完成后,即使关闭命令行工具或者退出console,进程仍然处于启动状态(占据了对应端口),意味着四个节点仍然在正常工作中。
开发智能合约应用
准备智能合约
将需要用到的Solidity智能合约放入~/fisco/console/contracts/solidity的目录中,本人以工作中需要用到的审计合约AuditHashContract.sol为例。


// SPDX-License-Identifier: MIT
pragma solidity ^0.4.0;

contract AuditHashContract {
    mapping(uint64 => mapping(uint64 => string)) private AuditHash;

    function saveAuditHash(string memory hash, uint64 ctID, uint64 flowStartSec) public {
        AuditHash[ctID][flowStartSec] = hash;
    }

    function getAuditHash(uint64 ctID, uint64 flowStartSec) view public returns (string memory){
        return AuditHash[ctID][flowStartSec];
    }

    function verifyAuditHash(string memory hash, uint64 ctID, uint64 flowStartSec) view public returns (bool) {
        return keccak256(abi.encodePacked(hash)) == keccak256(abi.encodePacked(AuditHash[ctID][flowStartSec]));
    }
}
cd ~/fisco/console/

# 若控制台版本大于等于2.8.0,编译合约方法如下:(可通过bash sol2java.sh -h命令查看该脚本使用方法)
# 以下命令中参数“org.com.fisco”是指定产生的java类所属的包名,可自定义
bash sol2java.sh -p org.com.fisco
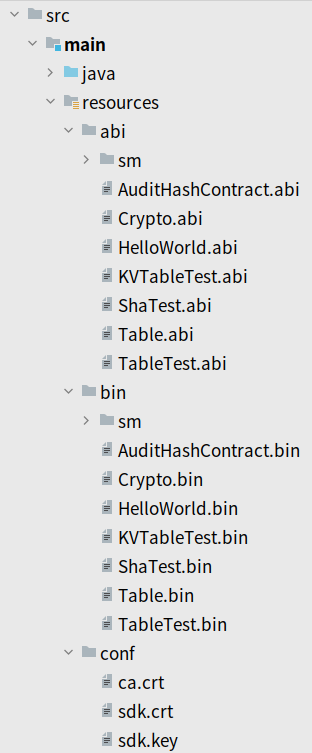
使用sol2java.sh将contracts/solidity下的所有合约编译产生bin,abi,java工具类。运行成功之后,将会在console/contracts/sdk目录下生成java、abi和bin目录,
查看编译结果:

在Idea创建项目以及创建各种配置文件
创建一个Gradle工程
该项目我命名为FiscoAPP_teach

在build.gradle中加入以下依赖
def spring_version = "4.3.27.RELEASE"
List spring = [
        "org.springframework:spring-core:$spring_version",
        "org.springframework:spring-beans:$spring_version",
        "org.springframework:spring-context:$spring_version",
        "org.springframework:spring-tx:$spring_version",
]
dependencies {
    testImplementation platform('org.junit:junit-bom:5.9.1')
    testImplementation 'org.junit.jupiter:junit-jupiter'
    implementation ('org.fisco-bcos.java-sdk:fisco-bcos-java-sdk:2.9.1')
    implementation spring
    implementation ('org.slf4j:slf4j-log4j12:1.7.36')
    runtimeOnly('org.slf4j:slf4j-log4j12:1.7.36')
}
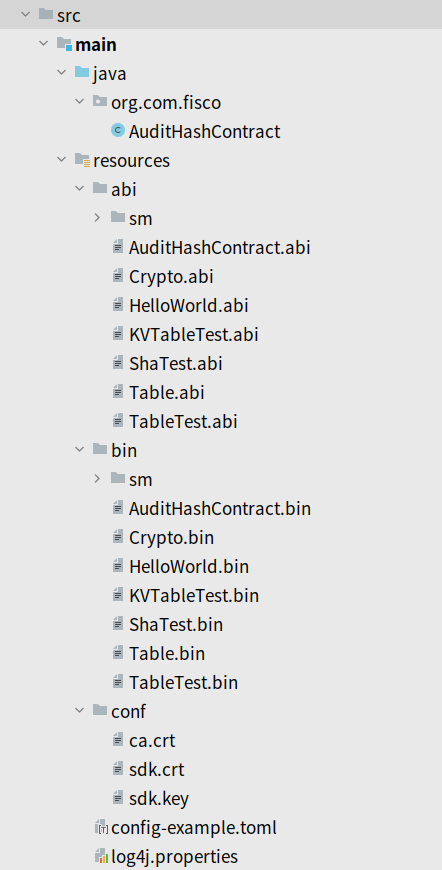
将sol2java.sh生成的java目标文件放入工程中,目录结构(包名)与前面参数一致

将节点证书,以及生成的abi、bin目录放在resources目录下
节点证书就是fisco/nodes/127.0.0.1/sdk目录下的所有文件。证书和某FISCO BCOS链是一一对应的,生成一条链就有唯一的一个证书。在控制台(console)或者idea中,若想在该链上工作,就需要拷贝证书到conf文件夹里。当FISCO BCOS链重新生成时,证书也需要更新。
创建配置文件config-example.toml,放在resources目录下
配置文件如下:
[cryptoMaterial]
certPath = "conf"                           # The certification path

# The following configurations take the certPath by default if commented
# caCert = "conf/ca.crt"                    # CA cert file path
# If connect to the GM node, default CA cert path is ${certPath}/gm/gmca.crt

# sslCert = "conf/sdk.crt"                  # SSL cert file path
# If connect to the GM node, the default SDK cert path is ${certPath}/gm/gmsdk.crt

# sslKey = "conf/sdk.key"                   # SSL key file path
# If connect to the GM node, the default SDK privateKey path is ${certPath}/gm/gmsdk.key

# enSslCert = "conf/gm/gmensdk.crt"         # GM encryption cert file path
# default load the GM SSL encryption cert from ${certPath}/gm/gmensdk.crt

# enSslKey = "conf/gm/gmensdk.key"          # GM ssl cert file path
# default load the GM SSL encryption privateKey from ${certPath}/gm/gmensdk.key

[network]
peers=["127.0.0.1:20200", "127.0.0.1:20201"]    # The peer list to connect


# AMOP configuration
# You can use following two methods to configure as a private topic message sender or subscriber.
# Usually, the public key and private key is generated by subscriber.
# Message sender receive public key from topic subscriber then make configuration.
# But, please do not config as both the message sender and the subscriber of one private topic, or you may send the message to yourself.

# Configure a private topic as a topic message sender.
# [[amop]]
# topicName = "PrivateTopic"
# publicKeys = [ "conf/amop/consumer_public_key_1.pem" ]    # Public keys of the nodes that you want to send AMOP message of this topic to.

# Configure a private topic as a topic subscriber.
# [[amop]]
# topicName = "PrivateTopic"
# privateKey = "conf/amop/consumer_private_key.p12"         # Your private key that used to subscriber verification.
# password = "123456"


[account]
keyStoreDir = "account"         # The directory to load/store the account file, default is "account"
# accountFilePath = ""          # The account file path (default load from the path specified by the keyStoreDir)
accountFileFormat = "pem"       # The storage format of account file (Default is "pem", "p12" as an option)

# accountAddress = ""           # The transactions sending account address
# Default is a randomly generated account
# The randomly generated account is stored in the path specified by the keyStoreDir

# password = ""                 # The password used to load the account file

[threadPool]
# channelProcessorThreadSize = "16"         # The size of the thread pool to process channel callback
# Default is the number of cpu cores

# receiptProcessorThreadSize = "16"         # The size of the thread pool to process transaction receipt notification
# Default is the number of cpu cores

maxBlockingQueueSize = "102400"             # The max blocking queue size of the thread pool
内容基本不用修改,主要是network下的节点peers,我是运行在本机的,保留不变即可,端口同理。而若运行在虚拟机上,可能需要进行更改,例如某虚拟机IP地址和端口可能是192.168.160.66:20000,192.168.160.66:20001,有更改的自行调整即可。
查询节点的peers可以在控制台中使用
getPeers
命令。

创建一个log4j.properties文件,放在resources目录下
内容如下:
### set log levels ###
log4j.rootLogger=DEBUG, file

### output the log information to the file ###
log4j.appender.file=org.apache.log4j.DailyRollingFileAppender
log4j.appender.file.DatePattern='_'yyyyMMddHH'.log'
log4j.appender.file.File=./log/sdk.log
log4j.appender.file.Append=true
log4j.appender.file.filter.traceFilter=org.apache.log4j.varia.LevelRangeFilter
log4j.appender.file.layout=org.apache.log4j.PatternLayout
log4j.appender.file.layout.ConversionPattern=[%p] [%-d{yyyy-MM-dd HH:mm:ss}] %C{1}.%M(%L) | %m%n

###output the log information to the console ###
log4j.appender.stdout=org.apache.log4j.ConsoleAppender
log4j.appender.stdout.Target=System.out
log4j.appender.stdout.layout=org.apache.log4j.PatternLayout
log4j.appender.stdout.layout.ConversionPattern=[%p] [%-d{yyyy-MM-dd HH:mm:ss}] %C{1}.%M(%L) | %m%n
最终目录结构
在Idea中调用合约以及查看块的信息
在Test中创建一个BcosSDKTest.java文件,其在包org.com.fisco下。

代码如下,运行即可:
package org.com.fisco;

import org.fisco.bcos.sdk.BcosSDK;
import org.fisco.bcos.sdk.client.Client;
import org.fisco.bcos.sdk.client.protocol.request.Transaction;
import org.fisco.bcos.sdk.client.protocol.response.BcosBlock;
import org.fisco.bcos.sdk.client.protocol.response.BcosTransactionReceipt;
import org.fisco.bcos.sdk.client.protocol.response.BlockNumber;
import org.fisco.bcos.sdk.crypto.CryptoSuite;
import org.fisco.bcos.sdk.crypto.keypair.CryptoKeyPair;
import org.fisco.bcos.sdk.model.TransactionReceipt;
import org.fisco.bcos.sdk.transaction.codec.decode.TransactionDecoderInterface;
import org.fisco.bcos.sdk.transaction.codec.decode.TransactionDecoderService;
import org.fisco.bcos.sdk.transaction.manager.AssembleTransactionProcessor;
import org.fisco.bcos.sdk.transaction.manager.TransactionProcessorFactory;
import org.fisco.bcos.sdk.transaction.model.dto.CallResponse;
import org.fisco.bcos.sdk.transaction.model.dto.TransactionResponse;
import org.junit.jupiter.api.Test;

import java.io.FileNotFoundException;
import java.math.BigInteger;
import java.util.*;


public class BcosSDKTest {
    // 获取配置文件路径
    public final String configFile = BcosSDKTest.class.getClassLoader().getResource("config-example.toml").getPath();
    @Test
    public void testClient() throws Exception {
        // 初始化BcosSDK
        BcosSDK sdk =  BcosSDK.build(configFile);
        // 为群组1初始化client
        Client client = sdk.getClient(Integer.valueOf(1));
        // 向群组1部署AuditHashContract合约
       CryptoKeyPair cryptoKeyPair = client.getCryptoSuite().getCryptoKeyPair();

     AuditHashContract sample = AuditHashContract.deploy(client, cryptoKeyPair);


        // 调用接口
        TransactionReceipt receipt = sample.saveAuditHash("abcdefg", BigInteger.valueOf(1), BigInteger.valueOf(1));
        // 获取群组1的块高
        BlockNumber blockNumber = client.getBlockNumber();

        BcosBlock block = client.getBlockByNumber(blockNumber.getBlockNumber(), false); //得到块的信息
        Object o = block.getBlock().getTransactions().get(0).get(); //在块中得到交易哈希
        BcosTransactionReceipt transactionReceipt = client.getTransactionReceipt((String) o); //通过交易哈希得到交易回执
        // 获取当前群组对应的密码学接口
        CryptoSuite cryptoSuite = client.getCryptoSuite();
        // 构造TransactionDecoderService实例,传入是否密钥类型参数。
        TransactionDecoderInterface decoder = new TransactionDecoderService(cryptoSuite);

        //events = decoder.decodeEvents("main/abi/sm/HelloWorld.abi", transactionReceipt.getResult().getLogs());
        String s = decoder.decodeReceiptMessage(transactionReceipt.getResult().getInput());
        System.out.println(blockNumber.getBlockNumber());
        System.out.println(s);
    }
}